
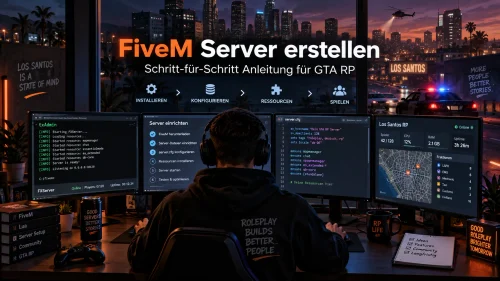
You create a FiveM server with the official server software (FXServer), a free registration key from the Cfx Portal and txAdmin. For a GTA RP server, a framework such as ESX or QBCore plus a database is also required.
This page is the installation guide. Which host you rent and what to watch out for with a game server or VPS is covered separately under Rent FiveM servers. Checking a ready-made template is another matter: Buy FiveM servers.
The following steps follow the official Cfx documentation (txAdmin guide, Vanilla guide, server commands, server download), accessed on November 10, 2026.
Contents
- Before you start
- What you need
- 1. Registration key in the Cfx Portal
- 2. Download server files (artifacts)
- 3. Start txAdmin and run the recipe
- 4. server.cfg: Key and Ports
- 5. Ports and firewall
- 6. Join your own server
- Afterwards: database, voice, backups
- FAQ
Before you start: Legacy or Enhanced?
FiveM for GTA V Enhanced is a separate path. Legacy and Enhanced use different clients and the matching GTA V version. In the official txAdmin guide, the Windows server file for Enhanced is called cfx-server.exe instead of FXServer.exe, the archive cfx-server_win_x64 instead of server.7z.
The examples below describe the commonly used legacy path with txAdmin. Don't switch to Enhanced just because of the newer name: scripts, maps and voice must match it. The official starting page for it is Setting up a FiveM Server.
What you need
| Component | Purpose |
|---|---|
| Windows or Linux computer or rented server | Runs the FiveM server software. To learn, a suitable personal PC is enough at first. |
| Cfx account and registration key | Registers your server. According to the Cfx documentation, the key is free. |
| Official server files, including txAdmin | Start and manage the game server. txAdmin is included in current FXServer builds. |
| Optional MariaDB | In common RP frameworks, this stores characters, money, and inventories, among other things. A pure CFX default test server does not necessarily need this. |
| GTA V and a matching FiveM client | So you can join and test it yourself. |
Lua knowledge and SaltyChat are not required for the basic installation. For permanent public hosting, compare offers on the hosting page instead of mixing the installation with a host comparison.
1. Create a registration key in the Cfx Portal
The official guide refers to the Cfx Portal. Older texts still refer to “Keymaster”; the current way is the portal.
- Sign in with your own Cfx account.
- Create a new server or key (in the getting started guide: big "+" button, fill in the details, generate the key).
- Later, copy the key into txAdmin or into the
server.cfg.
Treat the key like a password: do not put it in public repositories, screenshots, or support chats. If it has been published, replace it. Do not use a shared key from a purchased template.
In the Vanilla documentation, the entry in the server.cfg:
sv_licenseKey "deinSchlüsselHier"Source: Setting Up a Vanilla FXServer and Server Commands (sv_licenseKey).
2. Download server files (artifacts)
The server software is called FXServer. Cfx provides it via the official download page:
docs.fivem.net/docs/server-download/
According to the txAdmin guide:
- Open the server download page.
- Download the Recommended-build, not just any experimental version.
- Extract the archive (on Legacy Windows, typically
server.7z), for example toC:\FXServer\server. For this you need a program that opens 7z archives.
For FiveM Enhanced, the other file names mentioned above apply. For Enhanced, the documentation also lists the Microsoft Visual C++ 2017 Redistributable as a requirement before you start the server.
Overview of the official methods: Setting Up a Server (txAdmin, Vanilla Windows, Vanilla Linux, game server hosts).
3. Start txAdmin and run a recipe
txAdmin is the included web panel. The official "Ultimate easy setup guide" describes the Windows method as follows:
- Start in the extracted folder
FXServer.exe(Enhanced:cfx-server.exe). - txAdmin opens in your browser. If it doesn't, use the address shown in the console. The getting-started guide lists http://localhost:40120.
- Enter the displayed PIN and link your Cfx account.
- Set a backup password for the panel and accept the stated license notices if you agree.
- Give the server a name.
- As a starting point, choose "Popular Recipes" and initially the template CFX Default FiveM or “FiveM Basic Server (CFX Default)”. Other recipes (for example ESX or QBCore) may require a database.
- Confirm the data folder and go to the Recipe Deployer.
- Enter the portal key you created earlier and start the recipe.
- Once the recipe has finished running: check the configuration, then save and start the server.
Sources: Setting up a server using txAdmin and Setting up a FiveM Server.
Start FXServer for this path without additional +exec server.cfg. txAdmin should manage the game server configuration.
For an RP framework, after a successful default test, install the matching recipe (ESX Legacy, QBCore, or another documented recipe) on a separate test instance. First choose exactly one framework and test its unmodified base before mixing in other resources.
4. server.cfg: key and default ports
The vanilla documentation shows the typical listeners and the license key as follows:
endpoint_add_tcp "0.0.0.0:30120"
endpoint_add_udp "0.0.0.0:30120"

# License key for your server (https://portal.cfx.re)
sv_licenseKey changeme
The example 0.0.0.0:30120 is taken verbatim from the official Server Commands and the Vanilla guide. 0.0.0.0 means: listen on all IPv4 interfaces. The placeholder changeme you replace with your real key. For FiveM for GTA V Enhanced, Cfx documents that only one TCP and one UDP endpoint is supported at a time.
Other common settings (hostname, project name, maximum clients) are set in the same file or in the txAdmin CFG editor. Don't change anything you don't understand, especially access rights and admin permissions.
5. Ports and Firewall / Port Forwarding
You should keep two different ports apart:
- Game port: In the default configuration 30120/TCP and 30120/UDP (see
endpoint_add_tcp/endpoint_add_udp). - txAdmin: The web panel uses port by default 40120 and should be used for the initial setup via
http://localhost:40120be reachable. Do not expose the admin panel unprotected to the entire internet.
If you run the server at home and want friends from the internet to join, you need to forward the game port in your router's port forwarding settings to the computer running FXServer – and do so for TCP and UDP. Additionally, allow the same port in the Windows Firewall or the Linux firewall.
On a rented root or VPS server, the same firewall rules apply on the server itself; a router port forward usually isn't needed because the host already has a public IP. The exact click paths differ depending on the router and host's panel.
If txAdmin is reachable but joining fails, you are probably using the admin port instead of the game port, or UDP is missing, or one of the two firewall layers is blocking it.
6. Join your own server
The official getting started guide describes for a local server:
- Start the FiveM client (restart it after starting the server, if necessary).
- Locally, a button to connect to your own machine should appear.
- Alternatively, in the F8 console:
connectwith the matching address, for exampleconnect localhost:30120or the public IP plus port. - In-game, press F8 and enter the command
txcheck whether the txAdmin menu appears.
If joining your own server works, next have someone outside your network test it. Being reachable locally does not yet prove that the port forwarding is correct.
Then: database, voice, scripts, backups
If the default server is running, you can add an RP framework through the matching txAdmin recipe. You usually need your own MariaDB with a dedicated database user, not the root account in plain text in the server configuration. The exact minimum versions are listed in the documentation of the chosen framework.
Voice chat is not a mandatory part of the basic installation. Many servers use pma-voice (based on the built-in FiveM voice features) or SaltyChat (TeamSpeak plugin). Don't install both in parallel “for testing”. Players can find current plugin notes under Salty Chat Download.
Before the server goes public, at least the following should apply:
- External players can join.
- Character data survives a restart (if a framework with a database is running).
- Normal accounts do not have admin rights.
- A backup has been restored as a test.
A public RP project also needs rules, moderation and ongoing maintenance. No installation, however clean, replaces that. You can list a German-speaking project later in the FiveM server list.
FAQ
Can I create a FiveM server for free?
Yes: the key and txAdmin are free. A local test first avoids hosting costs. For a permanently public server, you plan hosting separately via Rent FiveM servers.
Do I need to be able to program?
Not for the basic installation via a txAdmin recipe. Custom script changes require appropriate knowledge. Money, inventory and permissions must be checked server-side; a client event is not a trustworthy authorization.
Does FiveM work on PlayStation or Xbox?
No. FiveM is intended for PC. A self-hosted server doesn't change that.
Where do I get the key – Keymaster or Portal?
The current official documentation refers to the Cfx Portal at portal.cfx.re. “Keymaster” is the older name for the same purpose.
Official sources (retrieved on 10.11.2026)
- Setting Up a Server
- Setting up a server using txAdmin
- Setting up a FiveM Server
- Setting Up a Vanilla FXServer
- Server Download
- Server Commands (
sv_licenseKey,endpoint_add_tcp,endpoint_add_udp) - Cfx Portal




 German
 English
Hi! Do you have a question about the instructions or other information you would like to share with us? Leave a comment!
Hello, I'm contacting you because of a problem at the base.
Is it possible to contact me?
Hello,
Sorry, I cannot speak French
Yes, contact me at [email protected]
I'll help you
You can also contact me via Discord: Livvux
Hey, how do I install the “Fivem Server Template Package?
Hey, it says so in the instructions above